
How to properly wire your paintings for hanging.
Follow these easy steps and hang your art with confidence.
Before You Start
Make sure you have a large surface and that it is very clean. You will work with the canvas face down. Make sure the surface is free of dirt. A bed sheet is what I usually use. You just want the surface of your canvas to be safe.
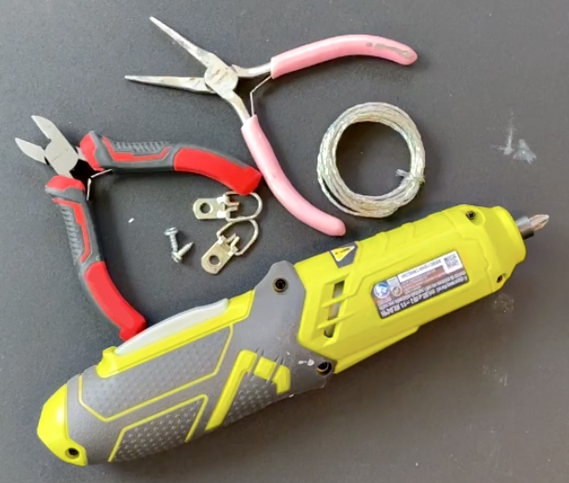
Tools Needed
Step 1
Measure from the top of the canvas. With a pencil, mark a point a little over a quarter distance of the entire canvas.
For example, in my video, I measured 6″ from the top on a canvas that was 18″w x 24″h.
To make sure it hangs close to the wall, avoid placing the wire near the center of the canvas.
Step 2
Using the marks you just made, screw in the D-Rings to the wood frame of the canvas. I would place something over the back of your painting in case your screw driver slips. The last thing you want is a hole in your painting!
Step 3
Run the picture wire through the first D-Ring. Take the wire across the canvas and run the wire through the opposite D-Rings.
Step 4
Loop the wire through the D-ring into a knot and pull tight with needle nose pliers. Then do the other side. Make sure the wire is tight but has just enough give so it can hang properly. I pull on the center of the wire and then tighten the other side as seen in video
Step 5
After knotting the wire to both D-rings, tightly twist or wrap the excess wire back around itself for each side. (See video)
Step 6
Cut excess wire making sure you cut close as possible to the twist knot. This is to ensure you don’t stab yourself of someone else with the protruding wire.
That’s it!